REVISION HISTORY
| EDITION | DATE OF REVISION | REMARK |
|---|---|---|
| 17th | 2020-Jan-08 | added "APPENDIX 5: TESTING CONNECTION WITH HYPER TERMINAL" |
| 16th | 11th of November, 2019 | added "CONFIGURE THE IP ADDRESS USING "upgrade.exe"; moved to appendix for "CONFIGURE IP ADDRESS USING LAN PORT-TO-LAN PORT METHOD"; moved to appendix for "RESET IP ADDRESS"; moved to appendix for "SEARCH CURRENT IP ADDRESS" |
| 15th | 8th of February, 2018 | Revised the “Installation Guide” to reflect the new model, “SG-B-8-L-W” |
| 14th | 13th of November, 2015 | Added “Ms. Nur Shafiqah binti Muhamad Baharum, Degree in Computer Science (Artificial Intelligence) National Defence University of Malaysia”; Amended picture of IP address |
| 13th | 11th of November, 2015 | Added a) turn off the switch labelled “C/A” to turn off the power; Revised "INSTALLING DRIVER FOR MOBIGATE SG-4-E"; Revised "CONFIGURE IP ADDRESS"; Revised "INSTALL VIRTUAL SERIAL PORT"; Removed "SOFTWARE: SMS ENGINE"; Removed "SOFTWARE: SMS ENGINE MONITOR"; Removed "DATABASE" |
COPYRIGHT
Copyright © 2009 – 2019 MOBITEK System Sdn. Bhd. All rights reserved.
No part of this document may be reproduced, distributed, stored in a retrieval system or translated into any language, in any form or by any means, electronic, mechanical, magnetic, optical, photocopying, manual or otherwise, without the prior written permission of MOBITEK System Sdn. Bhd.
TRADEMARKS
MOBITEK® is a registered trademark owns by MOBITEK System Sdn. Bhd.
MobiGATETM is a trademark belonging to MOBITEK System Sdn. Bhd.
Product names, logos, brands and other trademarks referred in this document are the property of their respective trademark holders and are used only to directly describe the products being provided.
DISCLAIMER
MOBITEK makes no representations or warranties with respect to the contents hereof and specifically disclaims any implied warranties of merchantability or fitness for any particular purpose.
Furthermore, MOBITEK reserves the right to revise this publication and to make changes from time to time in the contents hereof without obligation to notify any person of such revision or changes.
ACKNOWLEDGEMENT
We like to extend our appreciation to the following persons for their contribution in revising this manual:-
- Ms. Teh Yee Looi, B. Eng. (Hons.) Communication & Electronic Engineering, UCSI University
- Ms. Shuba Shini, Diploma in Information Technology, Kolej MASA
- Ms. Sarini Binti Mohd Nur, Diploma in Information Technology, Kolej MASA
- Mr. Muhamad Fierdaus, National Defence University of Malaysia
- Ms. Nur Shafiqah binti Muhamad Baharum, Degree in Computer Science (Artificial Intelligence), National Defence University of Malaysia
- Mr. Mahdlurin Yahi Bin Djanadi, Diploma in Information Technology, Kolej MASA
SETTING-UP THE CHASSIS OF MOBIGATE
INSTALLING DRIVER FOR MOBIGATE SG-B-8-L-W / SG-B-4-L-W / SG-B-8-L / SG-B-4-L
There are 4 parts:
- Configure the IP address of MobiGATE — to change the default IP address of MobiGATE to IP address that is on your local area network.
- Install virtual serial port and configure virtual COM port on Windows server — to map the MobiGATE’s IP address and port with server’s COM port.
CONFIGURE THE IP ADDRESS USING “upgrade.exe”
- Connect MobiGATE to local area network and your server to the same local area network.
- Run the program “upgrade.exe” (located in the MOBITEK USB thumb drive) on your server.
- Click “Search all devices” to find IP address of MobiGATE.
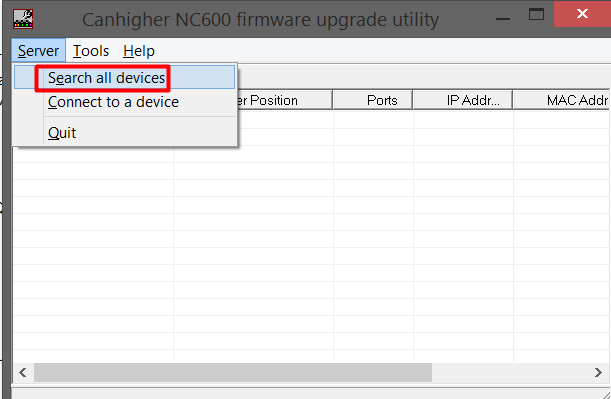
- Optional: click “connect to device” if want to connect to MobiGATE.
- If found, it will show a list of MobiGATE with IP address.

- Select MobiGATE (192.168.10.88).
- Click “Temporary change IP address”.

- Insert temporary IP address (192.168.10.98) and click OK.
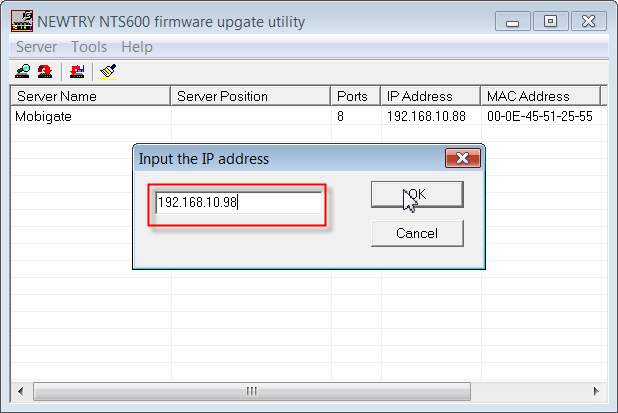
- The new temporary IP address will be updated on the list.

Note: it will revert back to its old IP address (192.168.10.88) after you power off. - Now access the web menu of MobiGATE via web browser using the temporary IP address (192.168.10.98), change the IP address from 192.168.10.88 (old) to 192.168.10.98 (new), click on “Submit”.
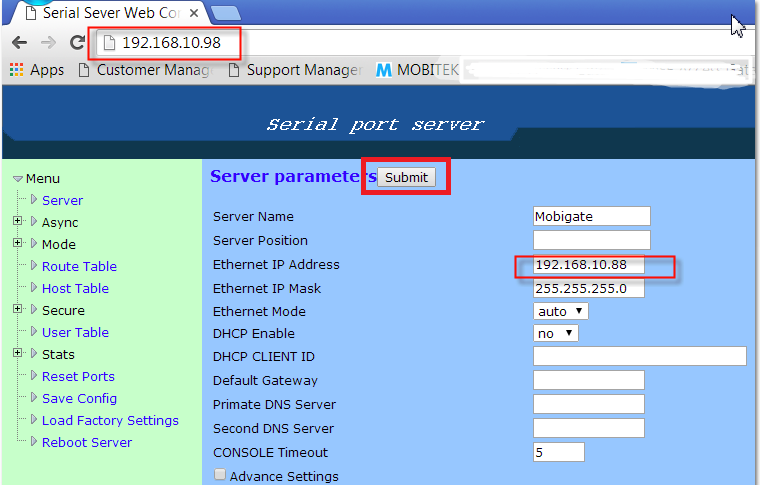
- Then goto “Save Config” menu and click “Save” to permanently change the IP address to 192.168.10.98 (new).

INSTALL VIRTUAL SERIAL PORT
- The following steps assume that the IP address of MobiGATE is 192.168.0.233.
-
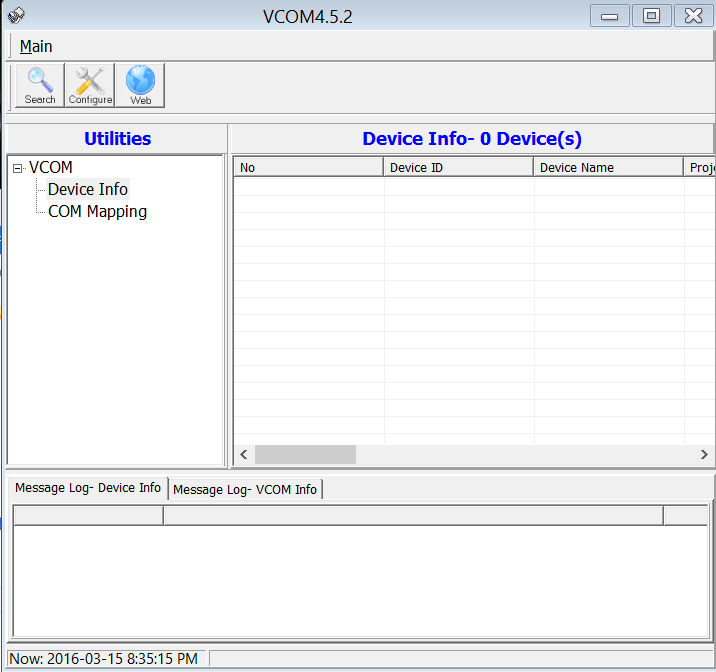
Run the installer “vcomsetup4.5.2.exe” to install “VCOM” which is a COM port mapping software.
-
for Windows 7 and above, run it as “administrator”
-
“VCOM” support these OS:-
-
Windows 7, 8, 10, 32-bit and 64-bit;
-
Windows Server 2008, 2012, 2016, 32 bit and 64-bit;
-
for more information, refer to https://mobitek-system.com/blog/2018/01/mobigate-supports-windows-10-server-2012-and-server-2016/
-
-
-
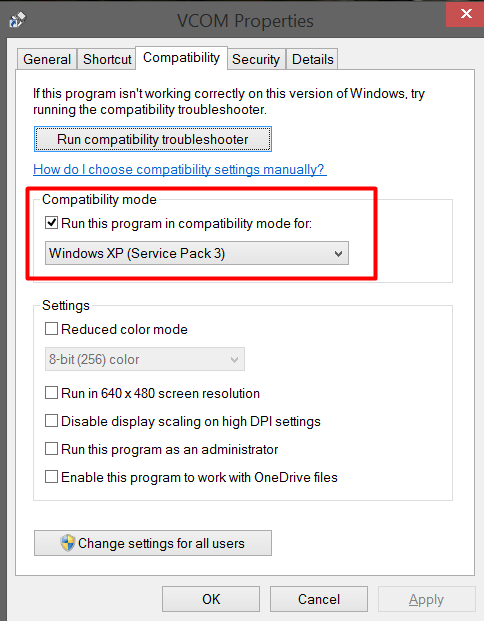
During the installation, if you encounter “This program has compatibility issues”,
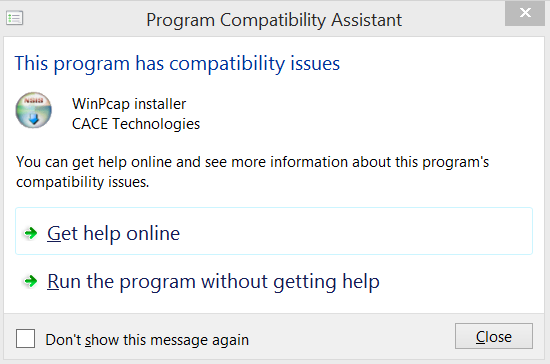
then click “Run the program without getting help” then goto “C:\Program Files (x86)\VCOM\VCOM\vcom.exe”, right click on it, select “Properties → Compatibility → check “Run this program in compatibility mode for Windows XP (Service Pack 3)” -
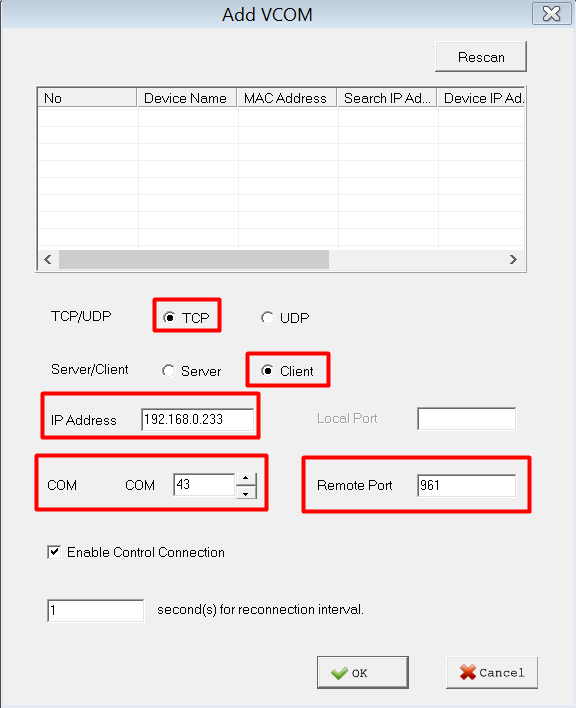
Goto “COM Mapping”, click “Add” and enter these values:-
-
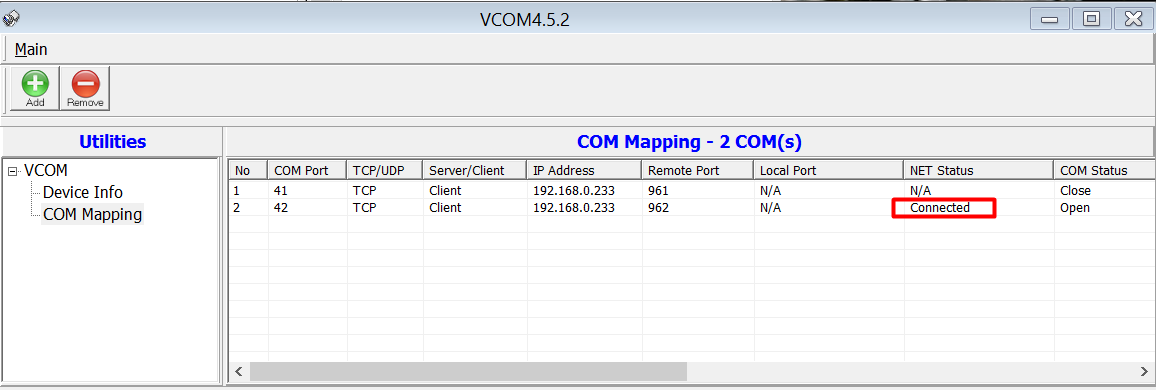
Repeat the above step until all the 8 modems are added and mapped according to the figure and table below:-

Modem no. IP Address COM Port Remote Port 1 191.168.0.233 41 961 2 191.168.0.233 42 962 3 191.168.0.233 43 963 4 191.168.0.233 44 964 5 191.168.0.233 45 965 7 191.168.0.233 47 967 8 191.168.0.233 48 968
TECHNICAL SUPPORT
Please write to Customer Support Team and include these:-
- Company name: (as stated in the invoice)
- Invoice number: (can also be obtained from the white label located at the back and top of the product; for the reasons, please refer to http://mobitek-system.com/blog/2014/09/why-invoice-number-is-required-when-requesting-for-support/)
- Description of problem: (please fill-in)
- Attach log file (located at “C:\Program Files\SMS Engine Enterprise Edition\log”)
- Attach “config.xml” file (located at “C:\Program Files\SMS Engine Enterprise Edition\”)
- Attach screen capture
APPENDIX 1: RESET IP ADDRESS
The purpose is to revert the current IP address of MobiGATE to default IP address.
Note: MobiGATE and your Windows server/PC/laptop must be on the same local area network.
- Open web browser in your PC/server/laptop, enter the current IP address of MobiGATE.
- Click “Load Factory Setting” and click “Load” as shown below.
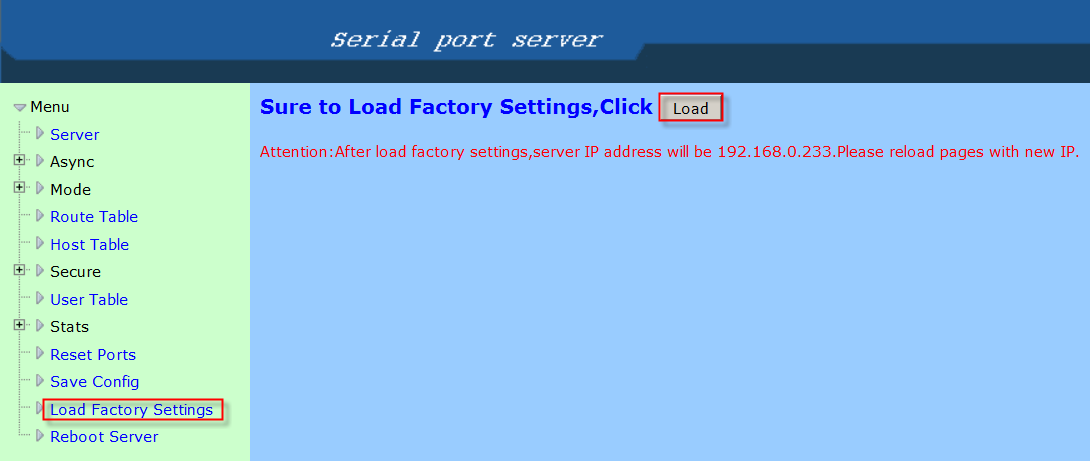
- The IP address of MobiGATE has been reset to its default IP address at 192.168.0.233.
APPENDIX 2: SEARCH CURRENT IP ADDRESS
The purpose is to search the current IP address of MobiGATE that is connected on the local area network.
Note: MobiGATE and your Windows server/PC/laptop must be on the same local area network.
- Open “VCOM” and click “Search” button.
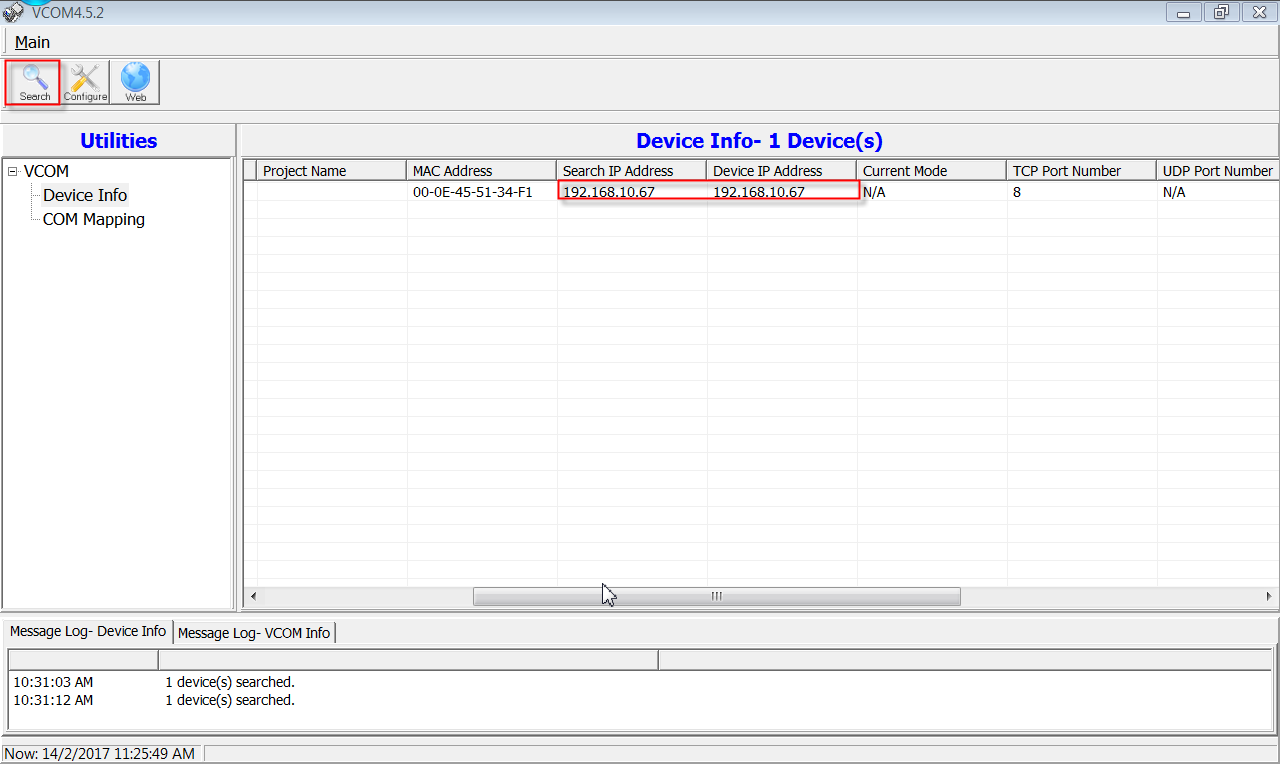
- It will display the current IP address of MobiGATE, in this example it is 192.168.10.67.
APPENDIX 3: HOW TO REPLACE A MODEM BOARD
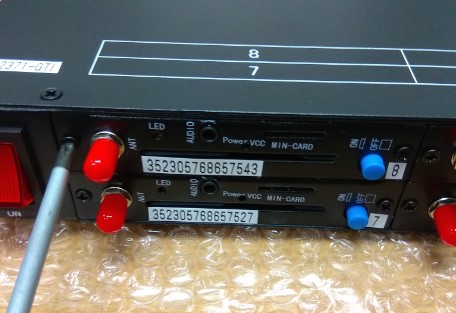
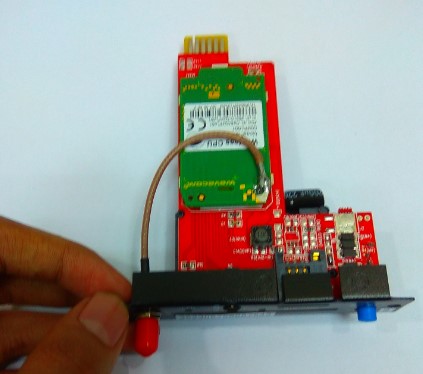
The above instruction is available on on-line video at https://mobitek-system.com/blog/2016/06/how-to-remove-and-replace-modem/
APPENDIX 4: CONFIGURE IP ADDRESS USING “LAN PORT TO LAN PORT” METHOD
- The default IP address of MOBIGATE is either 192.168.0.233. Should you wish to reset the IP address of MobiGATE back to its default address, then refer to this section of the guide — “Reset IP address“.
- If the IP address has been changed, then the new address should be labelled on the MOBIGATE itself or refer to this section of the guide to search for the IP address of MobiGATE — “Search Current IP address” .
- Use a ethernet cable, connect MobiGATE’s LAN port with your PC/Server/Laptop directly. So that you are able to access the configuration menu of MobiGATE to change its IP address.
- However, first you need to change the IP address of your PC/Server/Laptop:-
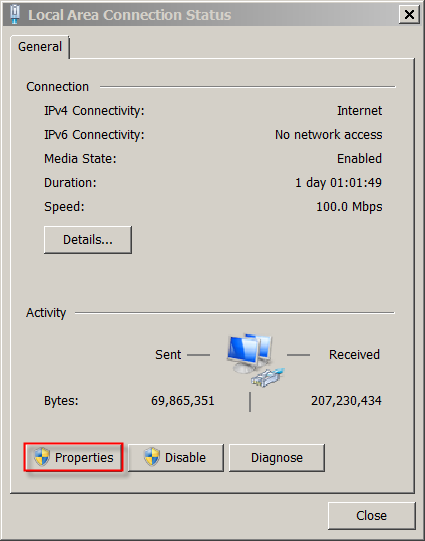
- goto “Control Panel -> Network and Internet -> Network and Sharing Center -> LAN”
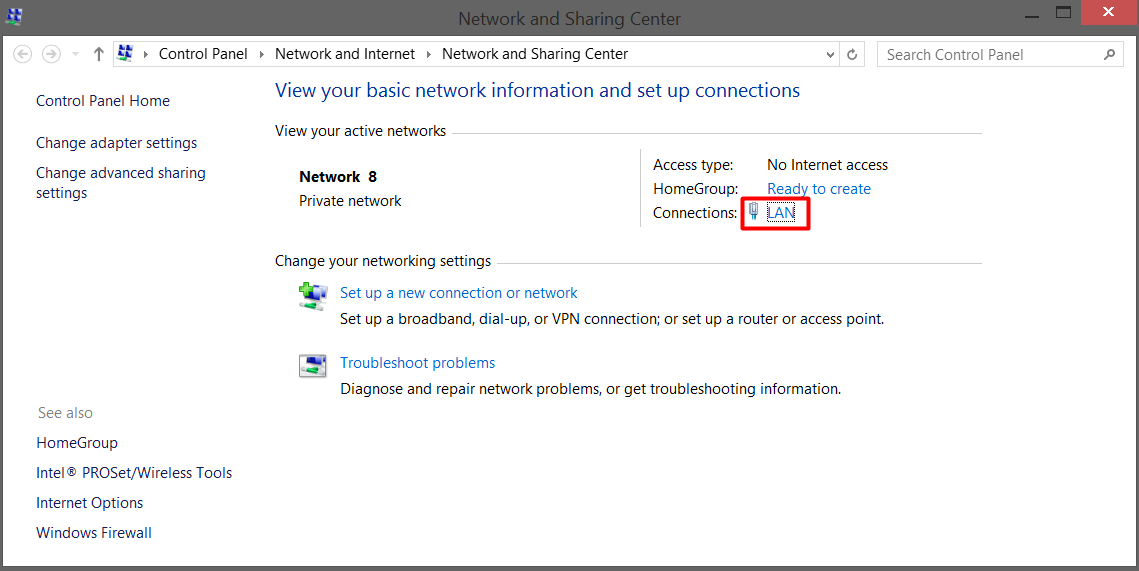
- click “Properties” as shown below
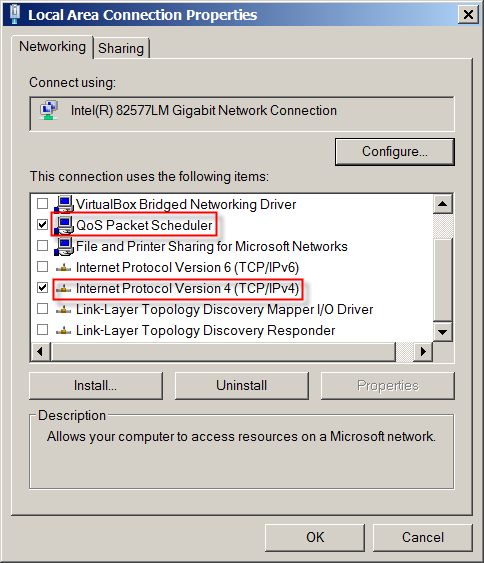
- this step is optional — uncheck all except “Internet Protocol Version 4” and “QoS Packet Scheduler” as shown (remember to revert back after configuration has been successfully completed)
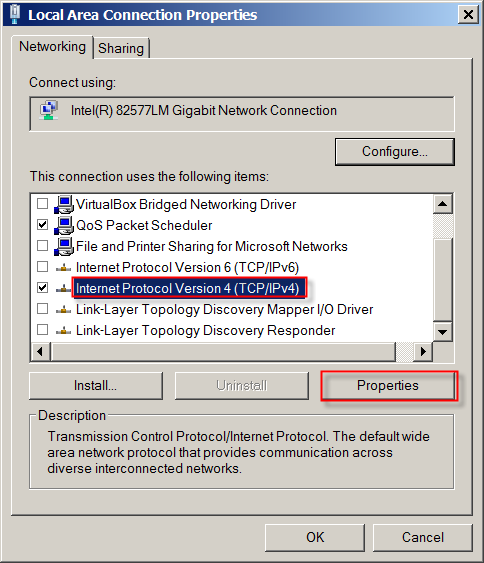
- Click on “Internet Protocol Version 4” and its properties
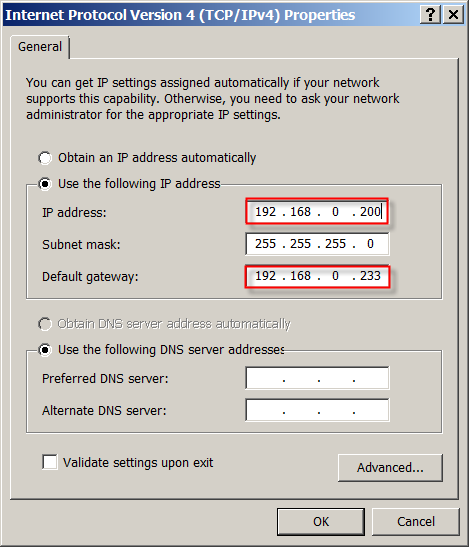
- IP address (so that your PC/Server/laptop and MobiGATE are on the same LAN ) = 192.168.0.200
- Subnet Mask = 255.255.255.0
- Default Gateway (IP address of MobiGATE) = 192.168.0.233
- goto “Control Panel -> Network and Internet -> Network and Sharing Center -> LAN”
- Open web browser in your laptop, and type “192.168.0.233”. Your web browser will show the configuration menu of MobiGATE:-
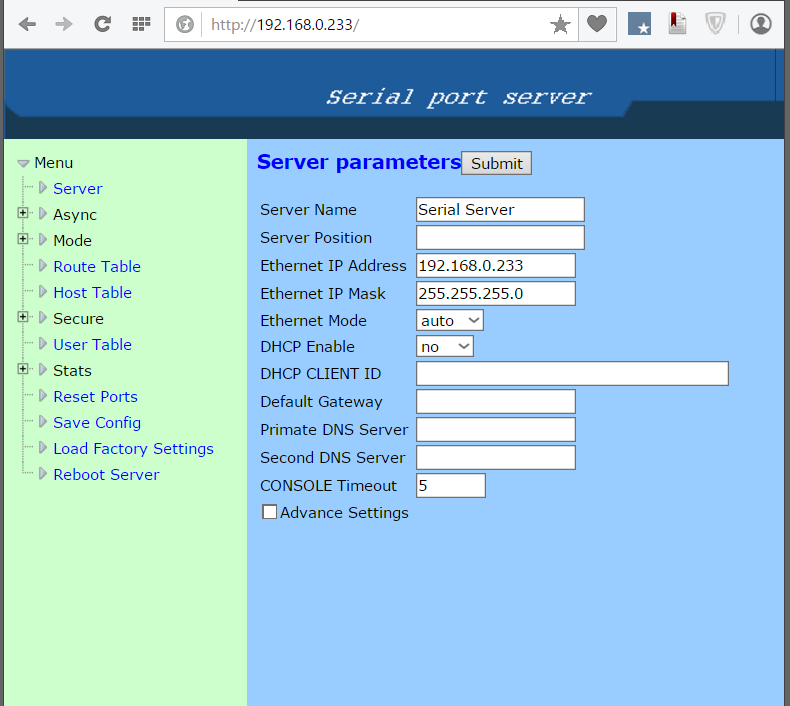
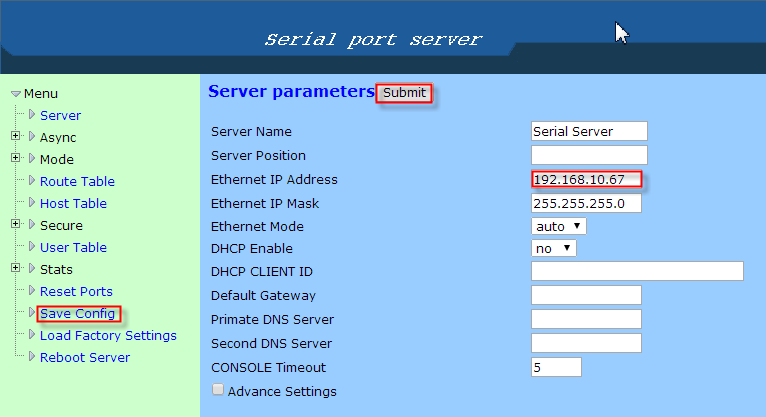
- Change the IP address of MobiGATE from 192.168.0.233 to the one that matches your existing LAN, e.g. 192.168.10.67
- Click on “Submit” button and then “Save Config” to ensure the MobiGATE’s IP address has changed:-
- Connect MobiGATE to your router or switch via ethernet cable, your router or switch should be 192.168.10.1 (Default Gateway).
- Restore the LAN properties and IP address of your PC/server/laptop back to its original (by selecting “Obtain an IP address automatically”), connect your PC/server/laptop to the router or switch via ethernet cable.
- On your browser, enter the new IP address of MobiGATE, e.g. 192.168.10.67, and you will see the configuration menu of MobiGATE.
APPENDIX 5: TESTING CONNECTION WITH HYPER TERMINAL
-
To test the connection, use “Hyper Terminal”:-

